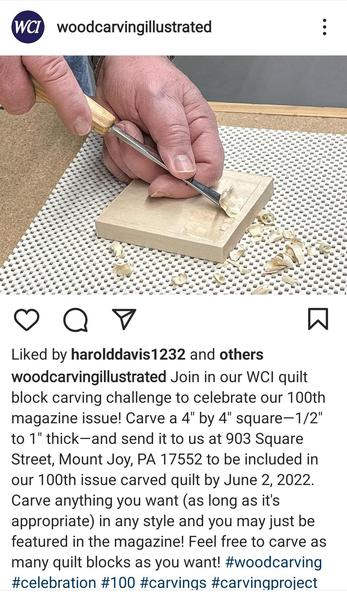
Woodcarving Illustrated is celebrating their 100th Anniversary Issue with a Quilt Block Carving Challenge!
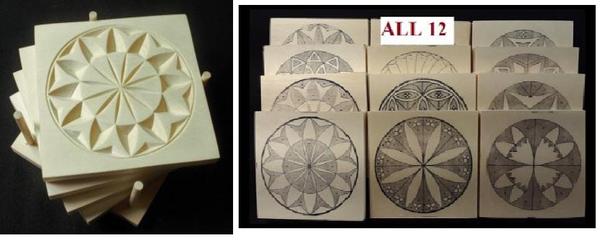
You can enter as many blocks as you like AND the size just happens to be the same size as the Coasters and Rosette squares that you may have already carved!
But don't wait! Mail your entry(s) to them by June 2nd!
❗I'm looking forward to seeing YOUR quilt block in the 100th issue❗
Ted wrote me this week looking for some advice...
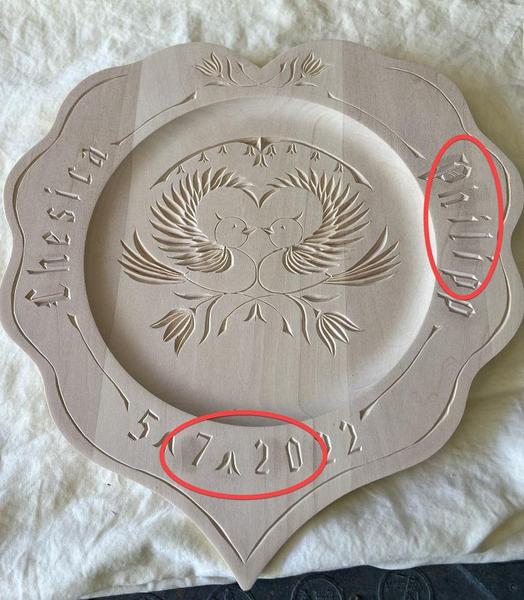
I doubt that I'm the first to have this problem so thought I would see what suggestions you have. Got careless with the pattern transfer tool and created a burn mark on a wedding plate I'm working on. I've used the sand eraser on it as well as various grits of sandpaper with minimal effect. Also tried (on a piece of scrap wood where I created a similar burn mark) rubbing alcohol and laundry bleach (various
concentrations) but with no success.
Short of continuing with the sanding process, do you have a "magic" solution? I do plan on staining the piece in the hopes that I can at least partially disguise the mistake.
My reply...
You've tried more ways than I've even thought of!
I think sanding it off is the only solution to get rid of the burn mark.
A gel stain finish will help hide any remaining dark spots.
I didn't have any magic tricks to remove the charred wood fibers. 😢
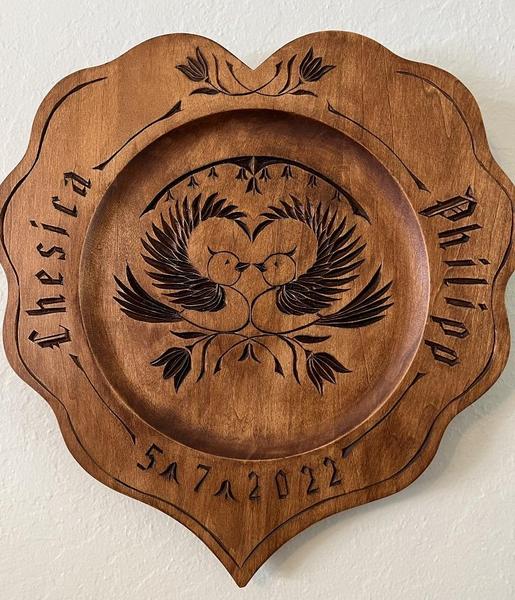
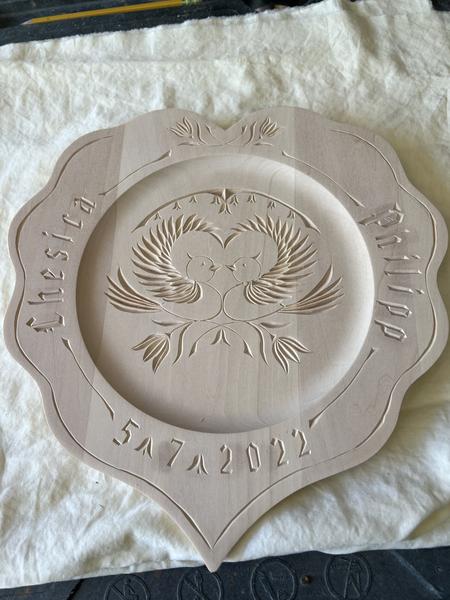
You can see the discoloration of the basswood inside the circles.
Here's how Ted finished this plate after sanding off the burn marks.
I’ve attached pictures of the work before and after staining and finishing with couple coats of wax. Turned out darker than I wanted but I think it is still “giftable.”
The final color and finish turned out darker than I intended since I did not use a sanding sealer before applying the stain (water based stain and the only sealer on hand was for oil based).
I asked Ted if I could share his work with you and he agreed along with saying, " I continue to learn from those posts."
He's spot on by knowing that we can learn from each other when we share problems we run up against while carving.
Here are a couple of additional insights I'll share with you.
Ted used a water-based penetrating stain without a sealer. It will turn out darker as compared to using a sealer before. Also, basswood will absorb penetrating water or oil stains unevenly and the color will be blotchy in spots. Areas that were sanded more AND some areas where the pattern transfer tool was used (look closely) will be lighter in color.
End grain (look around the inside edges of the recess) will be darker. This can be avoided by thoroughly sealing the wood first (sealer or clear finish, front and back) and then using a gel stain.
Also, look at this plate and you'll see that it consists of three different boards glued together. This is very common in plates because they are mass produced and color matching can't be done purely on a cost basis.
But don't fret the color differences from one board to the next.
Seal the surface and apply a gel stain.
After the first coat of stain has dried overnight, apply more gel stain on the areas where the color needs to be darker. Let it dry and apply more stain until the color matches across the surface of the plate. Repeat as needed.
This finishing process is explained in more detail along with many more finishing techniques, tips and tricks in the Finishing Course!
All Courses are included with your Platinum Membership.
Get a MyChipCarving T-Shirt for FREE with your order of $70 or more.
Wearing this shirt to your next show or club meeting will demonstrate your commitment to chip carving and will help spread the word about our great craft!