I hope you've had a great week and made some time for chip carving!
If you didn't do any chip carving, get out your knife, hone it to Scary Sharp and spend 10 or 15 minutes making chips
as SOON as you're done reading this email. Okay?
When you're done, send me an email with a picture of the chips you made. (of course this last step is optional, but I'd sure enjoy seeing what you accomplished)
You can do it!
I'm here to help 😁
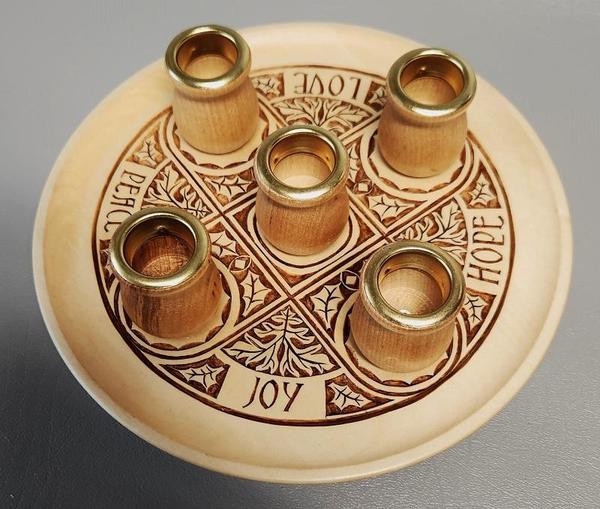
NEW October Project
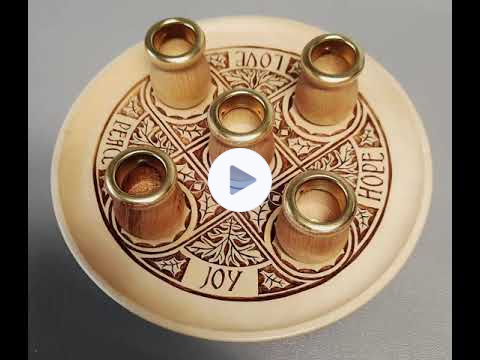
Advent Pattern, 8" Scoop Plate
If you'd like to get your own basswood Advent plate to carve, CLICK HERE.
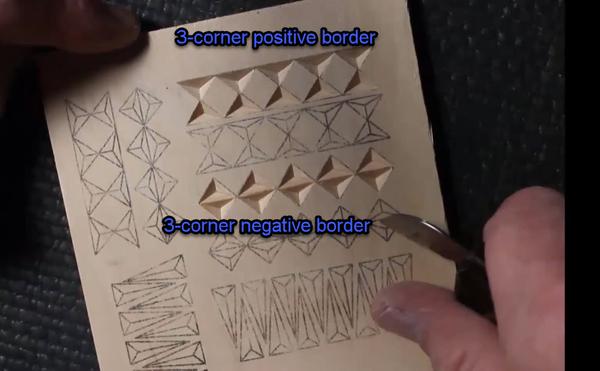
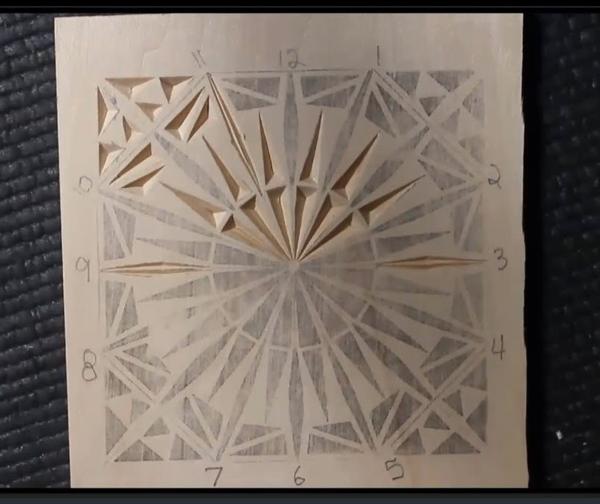
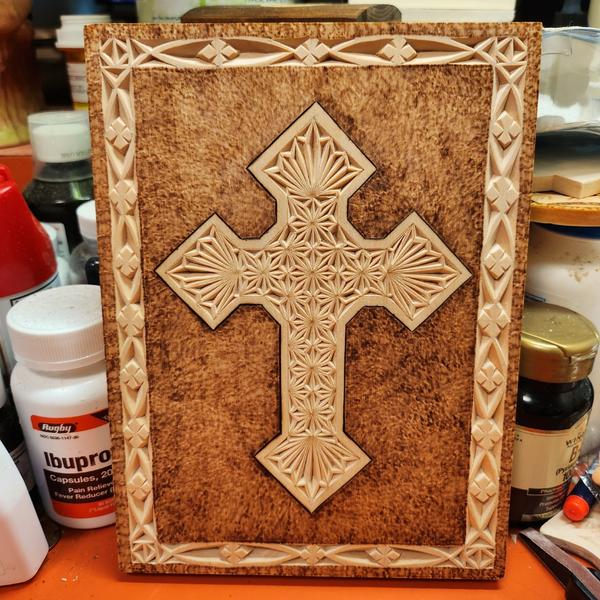
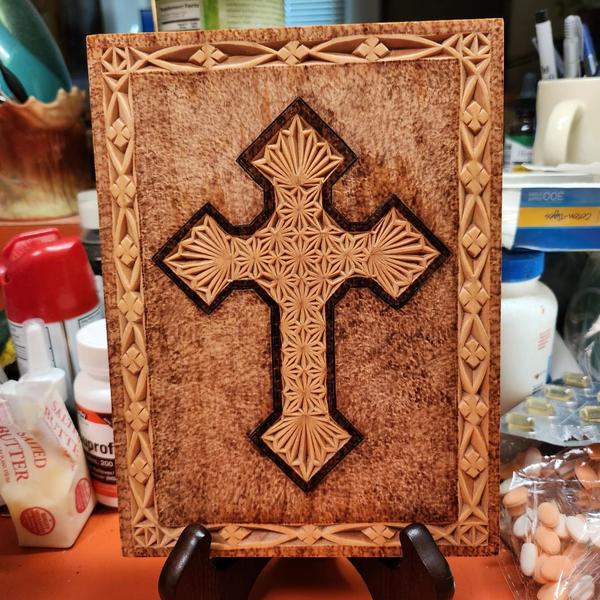
During the most recent webinar, last Tuesday night, we looked at 3-corner chips. These chips are a healthy part of every chip carver's diet.
We started with 2 versions of a 3-corner
border, positive and negative.
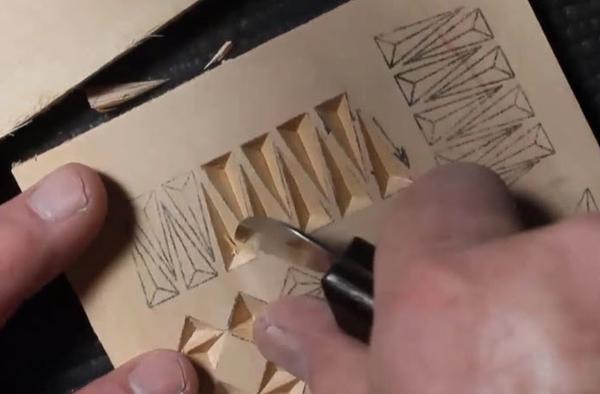
From there we moved on to elongated 3-corner chips where we concentrated on making with-the-grain cuts.
Then we turned the board 90 degrees and looked at how the order and direction of cuts might change and why.
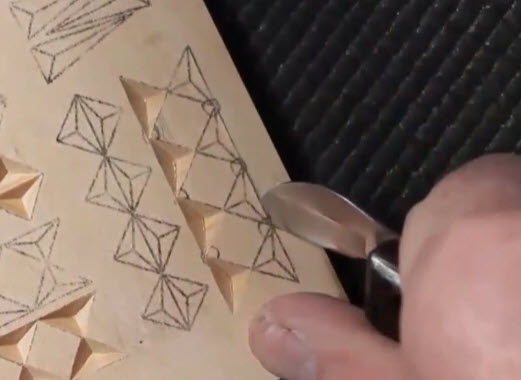
Do you know what the little hand drawn circles
identify in the picture below? (Answer given at the end of this email)
We finished up our time together carving this rosette that consists entirely of 3-corner chips. I explained how the numbers on a clock face help determine grain direction on each cut for both right and left-handed carvers.
A valuable part of attending a live event like this is that everyone has the opportunity to ask questions and get an immediate answer.
Those that couldn't attend can watch the replay and everyone can download this rosette pattern to practice the tips and techniques demonstrated.
Upgrade to Platinum and get immediate access to this month's video, pattern and webinar replay along with ALL of the 170+ videos, patterns, courses and monthly webinar.
Hi Marty,
Thanks for your email.
I hope you are well.
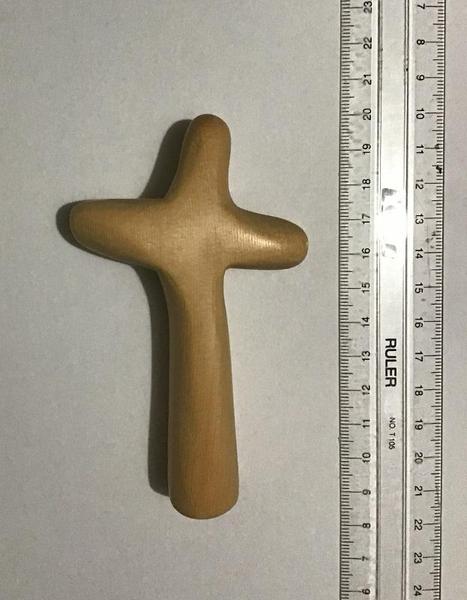
At present I am carving prayer crosses for members of our church who are in need. There is no chip carving involved. I have a slab of birds eye Huon pine I am using. Each one is approximately 10 cm by 7 cm by 2.5 cm. They are cut out roughly on a scroll saw then carved to shape with gouges and then an Italian riffler file. Then they are sanded to 5000 grit. After I get to 400 grit I wet them with water, leave for about twelve hours, then sand again, wet again, sand again and so
on until I get to 5000 grit. The end result is that they are like glass. I also do comfort birds in the same way. The end result is an extremely smooth surface like glass.
I am quite proud of the fact that several people have died holding a prayer cross or a comfort bird in their hand. They fulfil a need.
I ran a chip carving course at our annual Carve-In course last May. Two people attended and did your key fobs after doing a practice board. One did very well, but he is an extremely experienced carver. The other one didn't do as well, but kept at it. I had trouble getting her to hold the knife in the correct position. I repeatedly told her what to do, demonstrated many times, and corrected her grip many times. By the end of the third day she was getting the idea. Unfortunately
I didn't get any photos.
I use your knife sharpening technique all the time and have taught it to a number of carvers in our wood work club. I have a reputation for having really sharp knives, so much so that the professional carver who served an apprenticeship as a wood carver, sends other people to me to show how to sharpen knives. So thank you very much. If only I could get the same results with gouges.
I hope you find my comments of some interest.
My Very Kind Regards
Charles Castle
May God bless the work of your hands!
Q: Do you know what the little hand drawn circles identify in the picture below?
A: Short grain! Short grain is prone to chip out so the first step is to locate where it is!