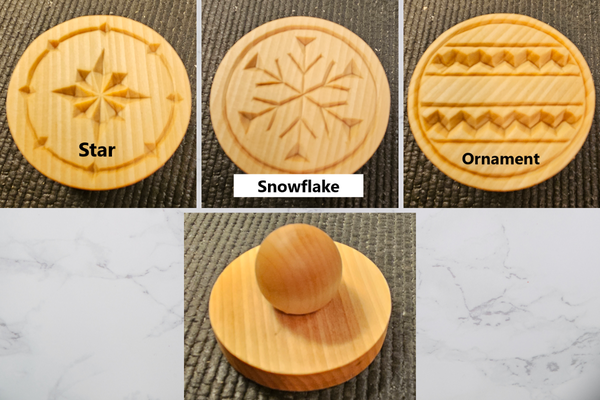
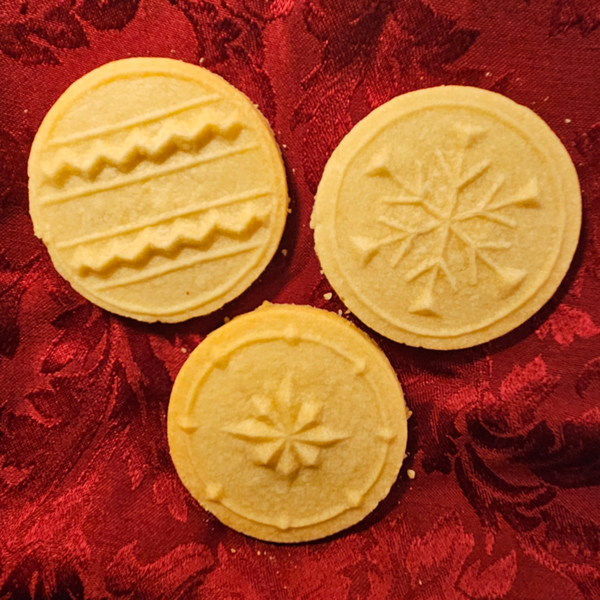
A few weeks ago, I shared the results of the cookie molds I’d carved during a Platinum member webinar, and the responses I received were very positive…so I decided to make them November’s project of the month! Based on the initial results I modified the patterns to make them stand out on the cookie and added a new
pattern. It took some work to make enough stock for the store but I’m happy to say I met my goal, which leads me to the third part of the My Chip Carving mission – to equip!
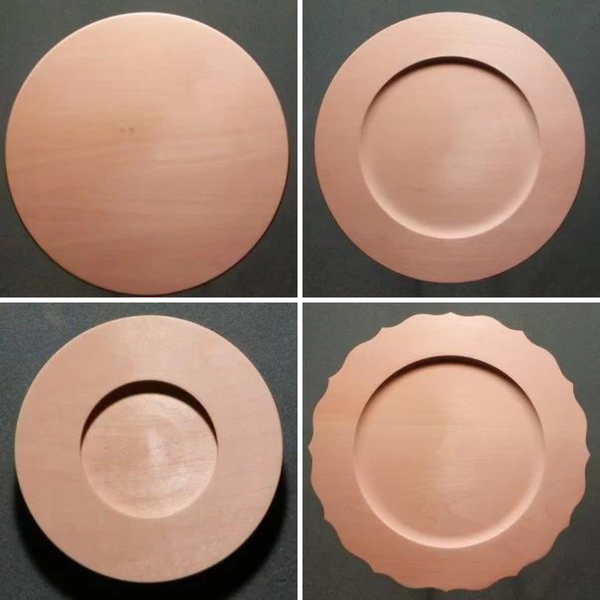
It’s important to equip yourself with the tools and items to implement what you’ve learned and are inspired to do, whether it’s the My Chip Carving knives, ornament blanks, plates, crosses, or plain practice boards. Out of the over 130+ product listings in the store, there are plenty of projects to
choose from both large and small. I’m always excited to add new items to the store like the cell phone holder, and now cookie molds.
If you have an item you’d like to see available or have an idea for a new project please feel free to send me an email. I can’t promise I’ll be able to add it to the store, but you never know!
These cookie molds are a fun project that result in a sweet reward!
Each cookie mold consists of a 2.75" (approx.) circle of 0.5" thick basswood, with a 1.25" ball knob with a flat base.
After carving the design into the mold, simply glue the knob on the back and then apply a food-safe finish of your choosing. I used a General Finishes Butcher Block Oil that I already had on hand. It's
made from a white mineral oil.
You Can Order Cookie Molds blank or with a Pattern already applied!
Blank Cookie Molds are 1 for $7, or buy 2 for
$12.50
Cookie Molds with Pattern are 1 for $9, or 2 for $16.50
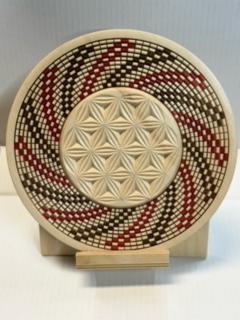
Recently a friend gave me an old craft magazine. She was cleaning out and found it and knew I would love it. I do! It has everything in it from making bread to knitting patterns, from making hats to wood
carving which of course is where I come in. The date on the cover says 1993 so I don’t know if it’s still in print. The thing that makes this so special is it’s all written in Norwegian! NO MATTER! I only look at the pictures anyway, and I used this classic pattern for the center carving on this plate. Inspiration comes from many different places.
Kathy
Thank you for the email Kathy. I love the story and wish I could find a Norwegian craft magazine! Excellent carving! What technique do you use to add the color? It is eye-catching.
Kathy's response:
I am a wood turner besides being a chip carver and I have been doing basket illusion for awhile now on my turnings. I just recently decided to combine
the two. The color is added with brush tip ink pens after wood burning the lines. I then add a coat of spray lacquer.
Thank you for sharing the details with us. Keep up the great work!