Discover a Low-Tech Way to Apply Carving Patterns 😊
Howdy !
During last month’s webinar, I quickly applied a few patterns using the Pattern Transfer Tool after receiving input on which patterns to carve. The Pattern Transfer Tool is my
preferred way to transfer patterns because it can do so accurately in a short amount of time. If you’re unfamiliar with it, there’s a great video on how to use it on the Store's Product page.
But what if you’re new to carving and are unsure you want to invest
in a Pattern Transfer Tool or don’t have access to a laser printer or photocopier machine to print the patterns you want to use? 🤔 If you find yourself in that situation, don't worry! The answer is simple and wonderfully low-tech: graphite or transfer paper!
Graphite paper is a bit like carbon paper but less messy, and transfer paper is similar but often comes in different colors for visibility on various surfaces.
When I was first
learning chip carving, I noticed graphite paper would leave darker, cleaner lines, but it was also harder to remove lines after I’d finished carving. A Tombow Sand Eraser was best at removing graphite paper lines. Transfer paper (I used blue transfer paper) didn’t create quite as clear lines and could smudge, but removing lines was easier. I sometimes used an
alcohol wipe to remove the transfer paper lines.
Whether using the Pattern Transfer Tool or tracing a pattern, it’s always important to tape the pattern to keep it in place. It’s also important to make sure the graphite/transfer side of the paper is facing down, in contact with the wood. Don’t ask me how I learned that… 🤣 A pencil or a stylus can be used for tracing. I preferred a stylus because of the option to use a large or small ball tip. I found the small tip useful for
more detailed patterns.
If a Pattern Transfer Tool isn’t in your toolbox yet, don’t let that stop you from carving the patterns you want. Go low-tech and reach for the graphite or transfer paper! When you decide your toolbox is ready for a Pattern Transfer Tool, one will be waiting for you in the store. 😉
Do you have any other low-tech methods you like to use for carving?
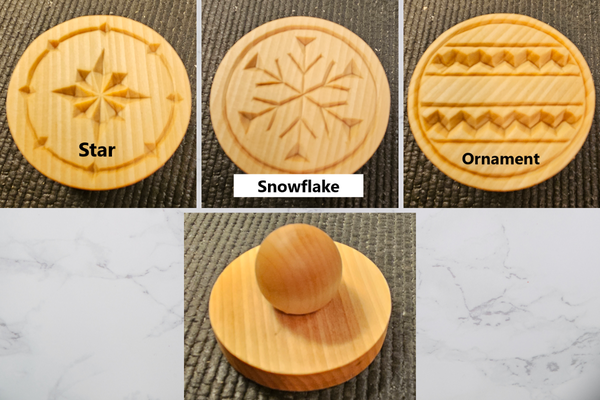
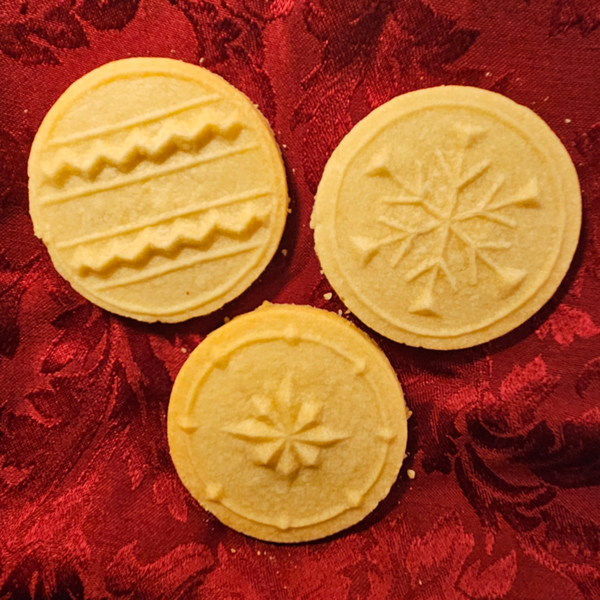
These cookie molds are a fun project that result in a sweet reward!
Each cookie mold consists of a 2.75" (approx.) circle of 0.5" thick basswood, with a 1.25" ball knob with a flat base.
After carving the design into the mold, simply glue the knob on the back and then apply a food-safe finish of your choosing. I used a General Finishes Butcher Block Oil that I already had on hand. It's
made from a white mineral oil.
You Can Order Cookie Molds blank or with a Pattern already applied!
Blank Cookie Molds are 1 for $7, or buy 2 for
$12.50
Cookie Molds with Pattern are 1 for $9, or 2 for $16.50
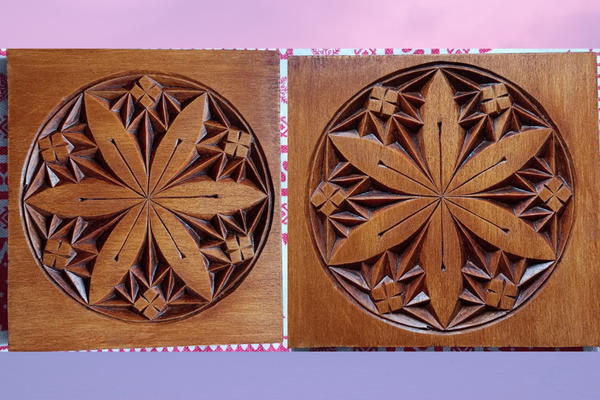
I am sending pics of my latest carving (basswood, stained). What always impresses me is how a simple rotation (of the pic/carving) can change the image. What do you
think?
Wishing you all the best,
Andrei
Thank you for your email and for sharing such a beautiful carving! I love the rich color and the way the lines continue between the elements and meet at the points is impressive and very pleasing. The equal sizes of the crosses show great skill and care went into the carving.
I agree that it is amazing how a simple rotation can change the look of a
carving.