Personalize your holiday gifts with creative carving!
Howdy !
I don’t know about you, but I’m looking forward to some downtime this coming week to celebrate Thanksgiving with family. It also gives me time to catch up on carving a few ornaments for gifts. I may even try to sneak in some cell phone stands, too.
Carving items for gifts always brings a good feeling, along
with a sense of anticipation to see the recipient's reaction when they open your gift. No matter where you are in your chip carving journey, beginner, experienced, or somewhere in between, the thrill of gift-making remains the same. One of the fun things about carving your gifts is the ability to get creative and personalize them.
On one ornament for a baby’s first Christmas, I carved the child’s name, Sterling. I also knew his middle name was Ford, so I made his
name resemble the Ford logo by adding a blue oval around it! The odds are that most people won’t make the connection, but my friend appreciated it, and I enjoyed the creative challenge.
I hope you can enjoy some time with family and friends this week and make a few chips, too!
What are some of the creative ways you’ve personalized a carving?
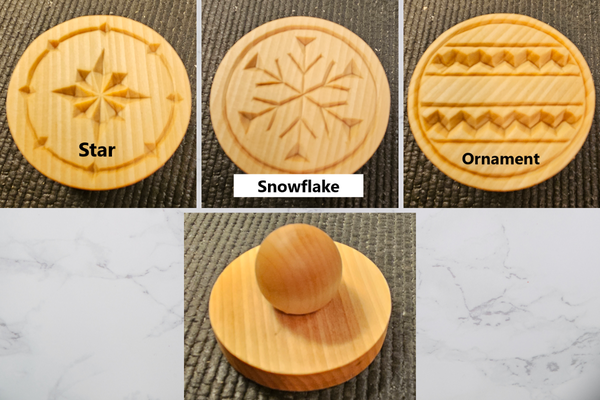
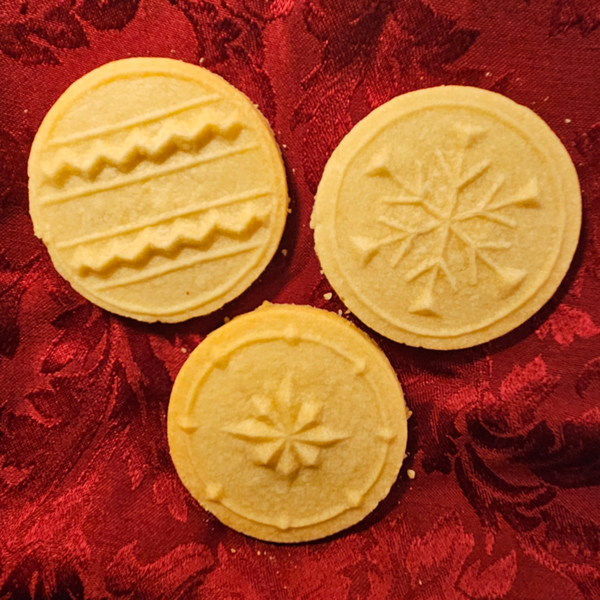
These cookie molds are a fun project that result in a sweet reward!
Each cookie mold consists of a 2.75" (approx.) circle of 0.5" thick basswood, with a 1.25" ball knob with a flat base.
After carving the design into the mold, simply glue the knob on the back and then apply a food-safe finish of your choosing. I used a General Finishes Butcher Block Oil that I already had on hand. It's
made from a white mineral oil.
You Can Order Cookie Molds blank or with a Pattern already applied!
Blank Cookie Molds are 1 for $7, or buy 2 for
$12.50
Cookie Molds with Pattern are 1 for $9, or 2 for $16.50
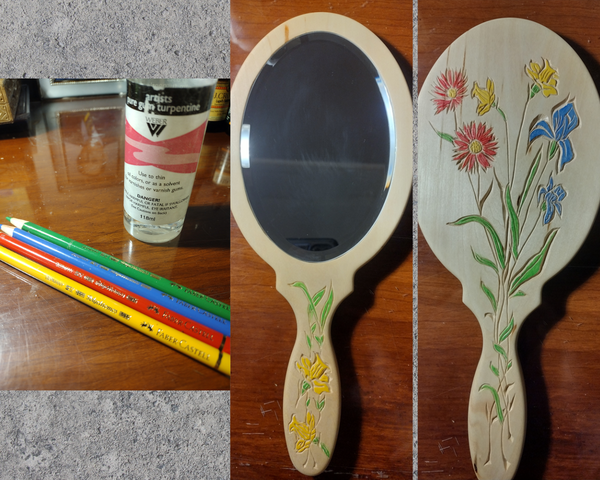
Carl used a unique color technique on his free-form carving!
Troy,
I just finished my second MCC mirror
project. Both were the flower patterns. I used a color technique I learned about before I found MCC. The third pic is of Faber Castell oil paint pencils and pure art grade turpentine. The pencils color beautifully, then you can blend the colored areas with a Q-tip dipped in turpentine. It's great because you can make the colors rich and solid, or ease up and the turpentine basically stains the wood with a lighter shade. This way I color before any sealer is applied, yet it's easy to
control because of the pencil form, and the turpentine basically gives another control opportunity. It's finished with 4 coats of satin DEFT lacquer spray. I'm proud of this one and am thrilled with how it turned out!
I'm just sharing because you have asked us to, and because I don't recall seeing this color technique by anyone else.
Best regards, Carl
You should be proud of the way it turned out - it's a great use of color and nicely applied(not to mention the carving, too)! 😀 I think it's a neat way to add color because it allows for good control of color placement and doesn't look like it really bleeds since it's not paint.
Thank you for sharing. I am sure others will be interested in this technique as much
as I am!