Readers reminded me not to rush the finishing process.
Howdy !
If you’ve ever spent hours carving a project only to have the finish turn out less than perfect, you know how frustrating it can be! After writing recently about not rushing near the end of a carving, I heard from several of you who pointed out another area where patience really pays off: the finishing process. I have to admit that finishing
often isn’t my favorite part either, but it can make or break your project.
Sealing is Key: If you plan to stain your carving, always seal it first. Use a sanding sealer, pre-stain conditioner, or a few coats of clear spray matte acrylic. Applying stain directly to raw basswood can leave you with blotchy, uneven color—and unfortunately, there’s no real way to undo it once the wood has soaked up the stain.
Conditions Matter:
When using clear matte acrylic, pay attention to temperature and humidity. If the conditions aren’t right, you might end up with a cloudy finish. The good news? You can usually remove a bad finish with denatured alcohol, isopropyl alcohol, or mineral spirits and try again. It may not be fun, but it is possible.
Choose the Right Pre-Stain Conditioner: Both water-based and oil-based options are available, and either can help you achieve an even result
throughout your carving. However, using a water-based conditioner will raise the grain on the wood and may warp thin boards. If the grain is raised, then lightly sand it to smooth it out, being careful not to sand too much and remove the pre-stain conditioner.
Have you ever salvaged a carving after a finishing mishap, or discovered a trick that works every time?
I’d love to hear your stories and see your results. Drop me a line at troy@mychipcarving.com or reply to this email with your photos and tips.
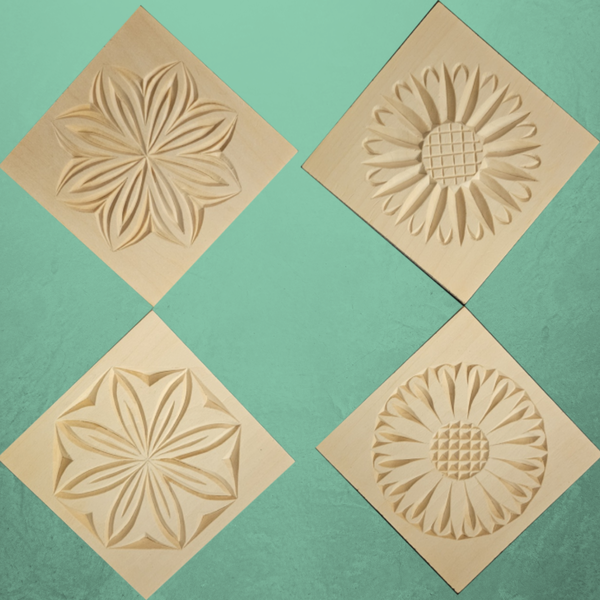
May's Monthly Project
Coasters: Positive/Negative Floral Patterns
Two different patterns to carve as positive and negative images on 4" Basswood square coasters. They can be ordered with the patterns applied.
Order a Set of Coasters with or without the Pattern already applied!
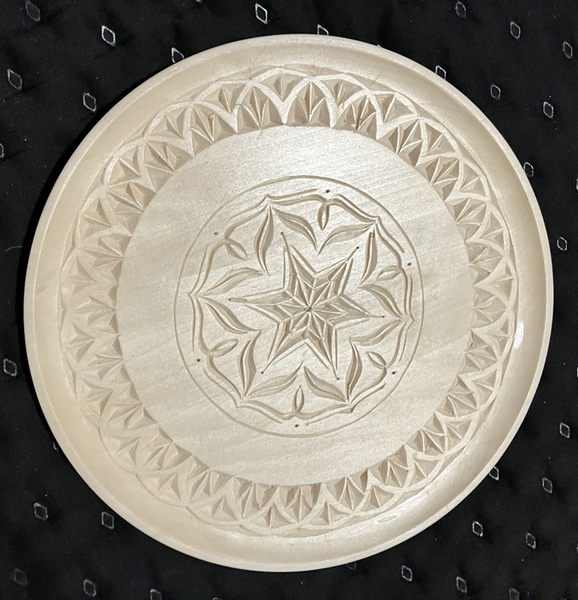
There was a reason why my basswood plate decided to become warped and unusable for my plate project this winter
As mentioned to you that is why I kept it as a practice cut plate with a pattern applied
So I can practice before my
real projects begin
Thanks for all your help on my first ever chip carved plates I did this winter
I was skeptical at first but you gained me confidence with your advisement
I am sure I will chip more plates this next winter
Thanks for all you do,
Dave
Hi Dave,
Your plate turned out great! I'm glad you took on the challenge of carving a plate. Based on the result, I hope it won't be your last.
It was good thinking to take the separated plate and use it for practice cuts - can't think of a better use of it.
Can't wait
to see the next one!
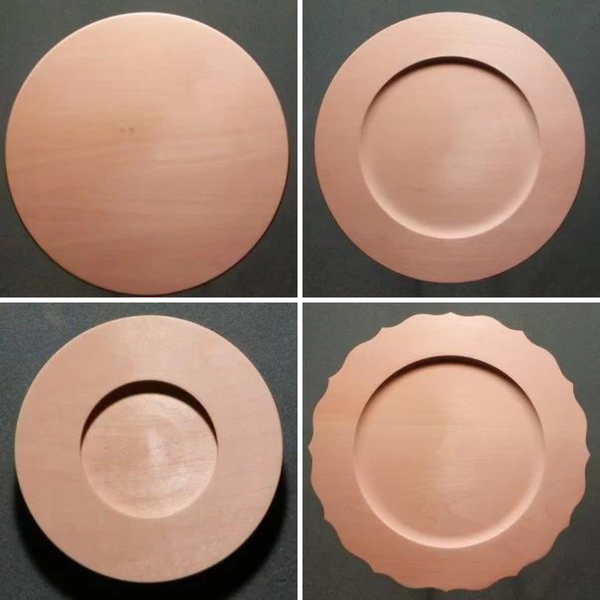
Ready to Carve a Plate?
Check out thePlatespage to see all of the clear Basswood Plates that are available! If you don't find the plate size or style you're looking for please send me an email at troy@mychipcarving.com