Read about how using paint differs from color pencils.
Howdy !
Following last week’s deep dive into using color pencils, I wanted to keep the color conversation going by exploring the differences between painting and color pencils. If you’ve been thinking about adding a splash of color to your carvings, but aren’t sure which method to try, you’re in the right place!
One of the biggest differences I’ve found when painting (I use acrylic paint) is the importance
of sealing the wood first. I like to use a couple of coats of spray acrylic to keep the paint from seeping into the wood and spreading to areas I didn’t intend to color. This not only helps with keeping sharp lines, but also makes it much easier to clean up any stray paint by wiping it off with a damp cloth!
The only downside to sealing before painting is that the paint doesn’t always adhere as well, so I often end up applying two or three coats for good coverage. I usually
start with one section and work my way around, and by the time I finish the first pass, the paint is dry enough for a second coat.
Paint also opens up a whole world of effects. Metallics, neons, or adding a pearlescent medium can really make your carvings stand out. Mixing paint colors is another way to get unique shades and highlights that you just can’t achieve with pencils alone.
If you decide to add stain over the paint, another coat a spray acrylic
should be added first to seal the paint. Adding stain can help soften brighter colors and give the overall finish an antique look.
Whether you decide to add color to your carvings is always a personal choice, and there’s no wrong answer! But if you choose to add some color, I hope you’ve found this information useful!
If you’re new to finishing, consider taking the Finishing Course. While I still need to add a lesson on color pencils, it covers everything from a simple, clear finish, using sanding sealers, how to use gel stains, antiquing finishes, and applying toners.
And if you have a favorite tip, I’d love to hear about it—just reply to this email or send your ideas to troy@mychipcarving.com!
November's Monthly Project
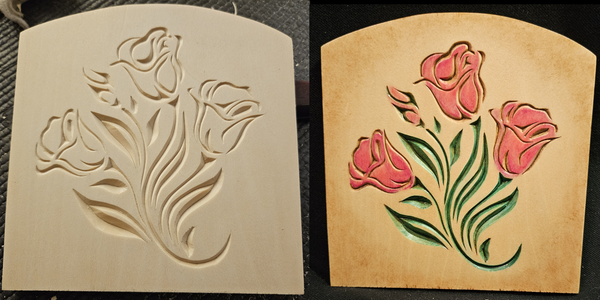
Napkin Holder: Free-Form Flowers
I thought it was time for another free-form pattern and decided on this flower pattern. It's a nice combination of a few larger chips and other thinner, flowing chips. Leave it natural, or add some color!
Order a Napkin Holder with or without a Pattern applied.
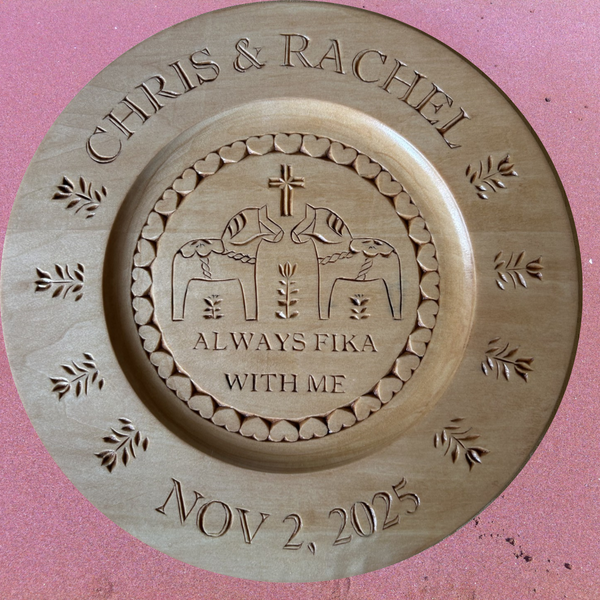
I'm excited to share with you the wedding plate I carved for my daughter and her new husband. If anyone is curious the word Fika is a swedish for coffee break. It is always shared in community. Thank you Troy for all your encouragement through our
video group calls and your website.
Patti
I can see why you're excited to share this - I love everything about it! I love the Dala horses in place of the standard love birds, and the shadow lettering is beautiful. Everything works so well together; it's obvious to me that a lot of thought went into it. The layout is also well done with even spacing. Thanks for explaining Fika.
Patti also shared the following with me:
I have been enjoying designing plates. I’ve learned how to create text in Word and use the transform function to arch the lettering. I then use the mirror function to reverse the lettering, print it and use a heat transfer tool. The process has been working well.
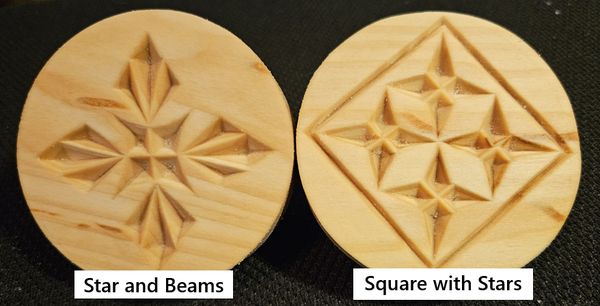
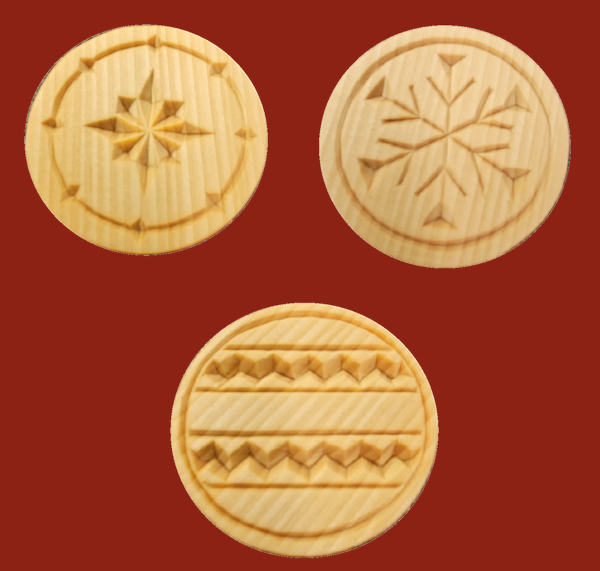
Still Time to Carve a Cookie Mold!
SAVE when you buy TWO Cookie Molds!
Cookie molds can be purchased with or without a pattern applied.
Each Cookie Mold consists of a 2.75″ (approx.) circle of 0.5″ basswood and a 1.25″ ball knob with a flat bottom. The cookie mold will come as two separate pieces to make carving easier. Once the pattern has been carved, just glue the
knob on the back!
Apply a food-safe finish to the cookie mold before using it to make any cookies. I used a simple butcher block oil(mineral oil). Don’t bake the cookies in the mold. 😉