How daily exercises reinforced the need to practice chip carving.
Howdy !
Ever notice how sometimes the hardest part of making progress is just getting started? I had a recent reminder of this when I visited the doctor about some knee pain. Thankfully, it was just a matter of building up strength and nothing more serious. I left with a stack of exercises, full of good intentions. But, as you might guess, my knee
didn’t improve a bit as time went by and those exercises sat untouched. 🙄
It wasn’t until I found an app and committed to a daily routine that things started to change. Just a few minutes a day, and I saw real improvement. It got me thinking about chip carving, and how practicing for even 15 minutes a day can make a difference, whether you’re just starting out or have been carving for years.
That’s the idea behind the Deliberate Practice Course: set aside a short window each day, focus on making the same cuts, and take a moment to evaluate your chips as you go. You’ll spot areas for improvement, and you’ll see your progress add up faster than you might expect. If 15 minutes feels like too much, start with whatever time you have. The key is consistency, not perfection.
Check back next week for an idea on what to do with the practice board when you're finished.
What projects have you been working on lately? I'd love to see them! Please send them to troy@mychipcarving.com.
February's Monthly Project
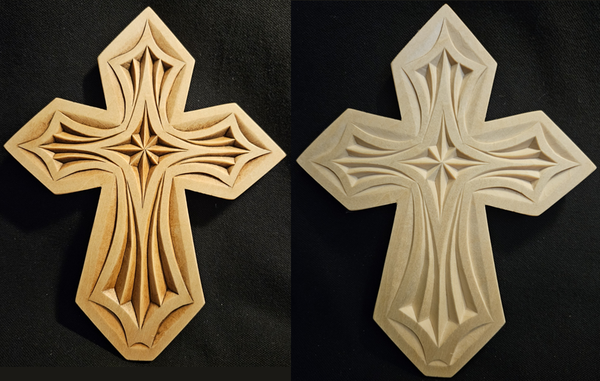
7" x 6" Wall Cross:
Inner Cross Pattern
The Old World Style cuts along the outside edge, highlight an inner cross pattern made up of Swiss-style chip carving cuts. On the left, I've added some gel stain over 3 coats of clear acrylic, while the right is unfinished basswood. Either way, I think it's a beautiful pattern that's fun to carve!
Order a Wall Cross with or without a Pattern applied.
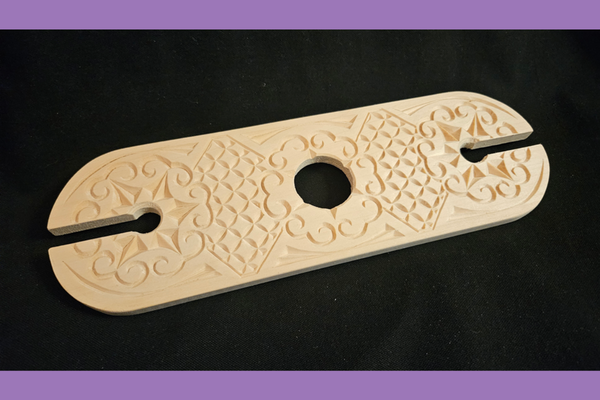
Elegantly display a bottle of wine with two wine glasses for yourself or your guests. Carve rosettes on the top, an ornamental pattern, or a pattern of your own creation! Wine Glass Holders can be ordered with or without a pattern applied!
The Rosettes shown are taught in the Rosette Carving Course.
I know the feeling of the tear out striking and had it happen on a Christmas ornament recently. I don’t know why I didn’t think about gluing it back in and re-carving. But more recently, the wood I have used to carve some crosses now
was brittle and in some places hard. One area the design had a 9 chip fan design. The first 3 chips cut nice and evenly. The next 3 chip I had to push much harder and the chips did not want to come out evenly. The rest were easy. Also, I had several ridges popped out during carving. After the second error I tried a different piece of wood. The cross carved nicely with this different wood.
Sometimes these issues are
knife sharpness or just the carver holding the knife differently. This is the first time I knew it was a piece of wood. I had several pieces of this wood. I used one to carve a free style angle and was successful.
Dave
Thanks for your email and for sharing your carving! Gluing the piece back works well as long as it makes a nice, tight fit.
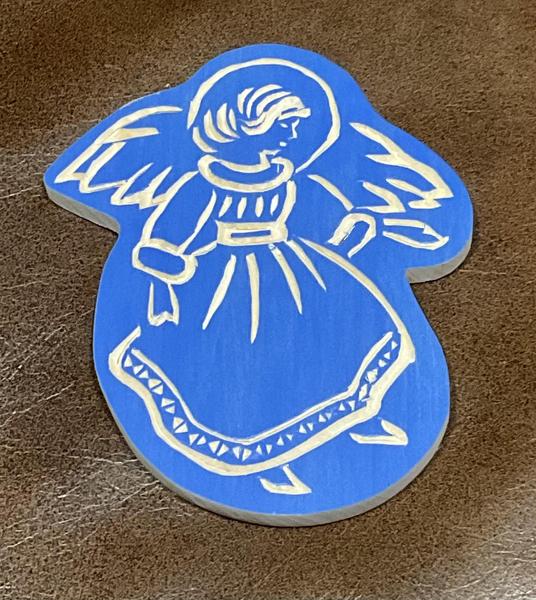
I love the angel carving! Did you paint it first and then carve? I don't see any paint in the carved areas at all.
Dave's explanation on the process used for the
angel:
On the angel, there was an article in the Woodcarving Illustrated magazine winter edition on how to do this type of carving. You paint the wood first, then a couple of lite coats of wipe on polyurethane, then I use Best-Test paper cement* to glue on the pattern, and finally carve the pattern. Removing the remainder of the pattern can be tricky if you let it set for a long period of time. I had wondered how to do this process for
several years. Luckily this article explained the process and made it simple. I hope you can use this on a couple of your future projects. I like the results and it is relatively easy.
On the crosses, I ordered some fresh wood from Hienecke and it cut like a dream. I guess I will have to use this other older wood on freehand carvings. This has less of a chance for chipping out.
* I use this product
because it is made for paper and it allows glued paper to be moved. It is on the expensive side. I considered rubber cement but thought it would be more difficult to remove the pattern. Contact cement is permanent and would require sanding the paper off the carving. The sanding would remove some or all of the paint.
Platinum membership gives you access to ALLof the Courses,Patterns, and Video archives!
Click below to Sign Up!
A Way to Use Stain and Colored Pencils...
I received the following clever idea with regard to Carl's Lesson Learned last week, involving adding stain over the colored pencils:
Regarding “Carl’s Lesson Learned,” one option is to stain the workpiece first; then carve the pattern; then use the
colored pencils. Result: Best of both worlds!. Clear coat to protect.